
Viewing the finished model in Virtual Reality. All you need is a smartphone, and Google Cardboard.
The art of producing 3D models is as an essential skill for anyone who wants to be involved in archaeology. If you haven’t been able to attend one of our masterclasses yet, then here’s what you need to know about the first step of the process: taking the photos.
Photogrammetry is a simple and powerful way to turn photos of anything from small finds, to entire landscapes, into 3D models. In fact, it’s so useful that we reckon it’s the best archaeological invention since the trowel.
Photogrammetry is the process of digitally overlapping lots of 2D photographs and turning them into 3D models. It’s dead easy to get to grips with the basics, and in this first lesson, that’s exactly what we’re going to do: the basics.
All you really need to get started and give it a go is a decent camera, a nice little bit of software and a few encouraging tips. Once you’re done, you’ll be able to share your creation online, for anyone in the world to see. Your model can even be 3D printed, used by specialists to interpret, and even to help create a Virtual Museum.
In this blog, we’re going to start with small and medium sized objects, and we’ll take you through the first step of creating 3D models: photographing the artefacts. We’ll cover how to use the software in the next blog.
So grab your camera, and your favourite palm-sized object of the moment and follow these simple steps to create your very own 3D model!
1. Choose the right camera
Any camera will do, but if you want a high quality model, you need a high quality camera. We reckon the minimum resolution you need is 5 megapixels, but that’s ok; even an iPhone 6 has an 8 megapixel camera.
If you want to create a really good model for genuine archaeological recording, then it’s probably worth considering a Digital SLR camera with a decent prime (non-zoom) lens of 50mm or shorter. If you only have a zoom lens, make sure to keep it at its shortest zoom length so the resulting shots all have the same focal length – the software can get confused otherwise. If you are photographing small finds a macro-capable lens will help you capture the detail without being blurry.
Bonus tip: You can use optional equipment to simplify or improve the photography. A tripod is handy to eliminate blurriness or to take photos with a longer exposure time. A turntable can be used if you want strict controls over lighting and/or do not have sufficient space to get 360-degrees of photographs.
2. Choose the right software

There are loads of software packages available that you can use to create 3D models. You can even get apps like 123Dme that will build 3D models straight from your phone’s camera. But once again, if you want to produce something that’s decent quality for genuine archaeological uses, then you’ll need something a bit more heavy duty. We use AgiSoft PhotoScan and you can download a 30-day trial version for free (although be warned: it won’t let you save your model, but it’s good for practice nevertheless).
3. Pick your object

If all you want to do is practice, you can use anything you’ve got at home, from a teacup, to a toothbrush. Just make sure it’s not an overly complicated object, or that it’s so smooth and shiny as to be featureless (again, the software will get confused; it needs recognisable reference points to work).
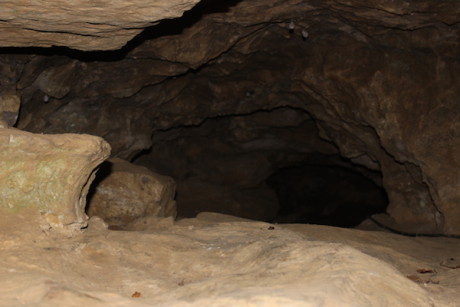
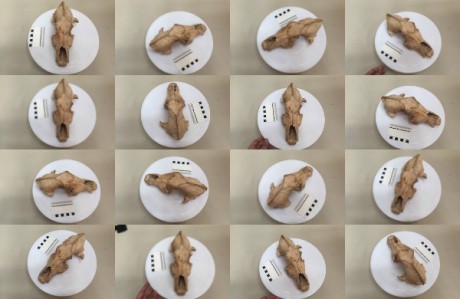
For this demo, we’re picking a medium-sized canine skull which is perfect for practicing with. This one comes from our site at Leiston Abbey, but we’re also working with finds from Yorkshire’s caves, including bone handles, animal bones and skulls, and Romano-British artefacts. By the time we’ve finished we’ll have built a Virtual Museum and if you want to help us, or sign up for a free tutorial, check out the Under the Uplands website.
Bonus tip: Some objects maybe difficult to work with. Avoid objects that have lots of sticky-out bits, hidden areas and that are really shiny or reflective. Solid, matt objects like rocks, bones and sculptures are easy to work with. So stick to something fairly straightforward.
4. Position your object

Your ultimate aim is to take lots of overlapping photos of the object so that every inch of surface has been covered three times. You can do in a couple of ways: You can place the object on a small turntable (if it fits) such as those used for icing cakes, and rotating the turntable while the camera and photographer stay put; or you can place the object on a normal table, and move around the object taking photos as you go.
Bonus tip: We prefer sticking the object on a turntable if it fits, because you can keep the camera on a tripod and get steady lighting, and no blur.
5. Get your lighting right
For best results, the object should be placed in soft and even lighting, avoiding any sharp shadow.
Bonus tip: Best shooting conditions are outdoors on an overcast or cloudy day (as long as it’s not raining).
6. Plan your photographs
Each photo you take needs to overlap with your previous picture by 75-80%. There’s no harm in having more overlap, but less reduces the model quality and can confuse the software. It really helps to do an imaginary run through before you start taking photos, because you’ll probably have to turn your object over at some point and figure out how to hold it still while keeping the light constant. You don’t want to get three quarters of the way through and then realise you’ve missed some, or that part of it is now in the dark, because again, it’s easier for the software if the pictures are all in the right order and overlaps with the previous one.
7. Take your pictures!

If you’re using a turntable, rotate it a couple of inches between each picture. Or, if you’re the one moving, take a pace or two around the object between each picture. Don’t try and stand in one spot and move the camera – move yourself! Make sure each shot is from a different place.
8. Take waaaay more than you think you need

Always take more photos than you think you might need. The main aim of taking multiple overlapping photographs is to blanket the object. This allows the software to recreate and map the surface as accurately as possible.
Bonus tip: Once you’ve taken the photographs, make sure to go through them and remove an blurry, unfocused shots. These images will not align properly in the software.
9. Upload and tinker away with the software

It’s pretty easy. You just need to import your photos, tell it to align them and let the software do all the work! In some cases, there will be a few more steps you need to do on the software, and we’ll be covering that soon in How To Do Photogrammetry for Archaeology – Part 2!
10. And you’re done! Here’s one that we made earlier…
Now for the best bit… share, share and share away! And remember, watch out for Part Two of our How To Do Photogrammetry for Archaeology series, where we’ll explain how to tweak, adjust and process your model. But for now, grab a camera and get snapping!